 Wet felting gives quick swirls of color and shows movement. You can needlefelt details, either images or words, with some wool yarn and a special, barbed needle. The needle and most of the feltmaking supplies are available by mail order from Black Sheep Designs and from Blue Goose Glen. Try 4-ply tapestry wool yarn and pull the strands apart to needlefelt words. For adding large, new areas of color to your pages you will need wool roving or wool scraps and a tool that holds multiple needles such as the Clover Needlefelting Tool (4 needles) or the Pine Needlefelting Tool (3 or 6 needles). Watch for a demo with the needlefelting tool in a future post.
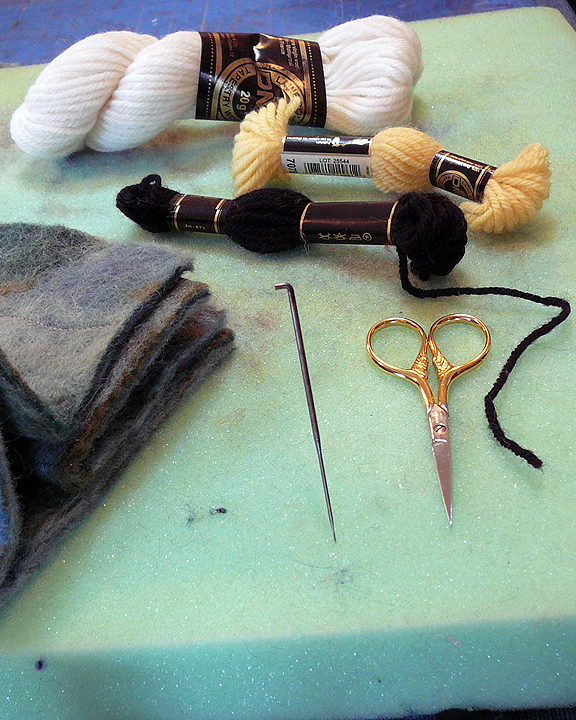
Tools: special needle for needlefelting; thick foam (such as high-density foam for chair pads) to put under your project; extra sharp pointed scissors
Materials: wool yarn (DMC tapestry wool is good); felted pages; wool roving (for larger blocks and shapes of color)
The needle, with its many barbs, is extremely sharp, so please be careful. Use an up and down motion all over the area of wool you want to attach. On the back of each page you will see the little tufts where you have pushed the wool through, and you will have a choice to leave it, trim it with a scissors, or use a disposable razor to shave it. For my cactus theme it seemed appropriate to leave it.


Next up: Binding the Book
Comments